Back to Blog Home
How to create a web portal: Quick and easy guide for 2025
[Hide]
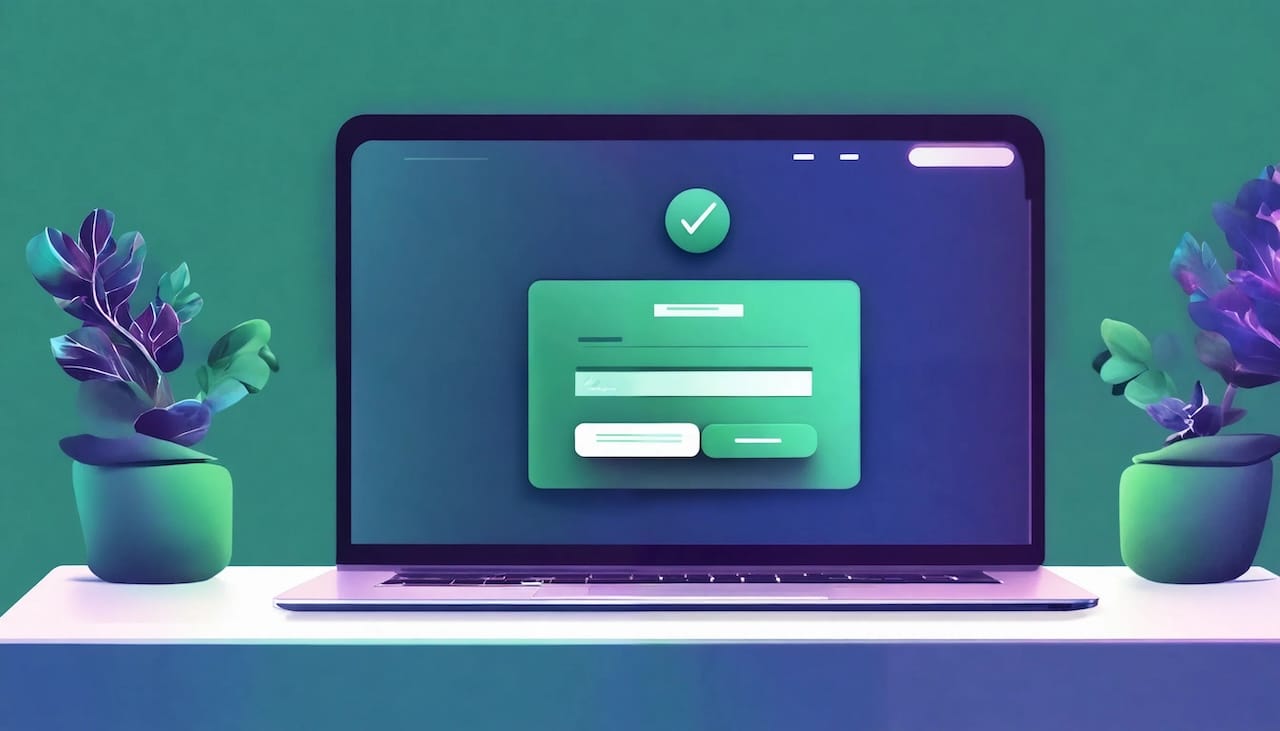
The modern web portal platform
Differentiate your service business with a white-label portal that gives your clients a one-stop shop to access dashboards, submit tickets, send messages, make payments, and more.
4.9 rating
If you want to learn how to create a web portal, you’ve come to the right place.
This guide will go over the exact web portal setup I’ve had for over two years now. It’s modern, looks clean, and integrates well with all the existing apps I use on a daily basis.
It also easily integrates with my existing website, so my clients can easily log into their web portal straight from my main website.
But before we jump into the steps on how to create your own web portal, let’s go over some important questions you might be asking yourself right now.
What is a web portal?
A web portal is a gated section of your website that allows customers and your team members to log into a dashboard to view important information, resources, and tools related to your products and services.
It’s a centralized place where you and your clients can discuss sensitive information about your services, get access to invoices and contracts, view pending tasks, upload and download files, and more.
What makes having a web portal great is that it improves the overall experience someone has working with you. It keeps everything organized and creates a safe home for all of your interactions with customers, clients, or students.
How much does a web portal cost?
The cost of your web portal depends on what features you need and the platform you choose. For example, if you hire a developer to create a web portal, it could cost you well into the thousands of dollars. But if you use an existing white-label web portal software, it could cost you as little as $40 per month.
It all depends on which route you go down and what you’re looking for. In this guide, I’ll show you how to get the best of both worlds — a fully customizable web portal that can be created in a fraction of the cost (and time) it would take a professional web developer to make.
Alright, let’s learn how to create a web portal that will make your business feel modern and different from the rest.
How to create a web portal for your website (in 4 steps)
Here are four steps to creating your web portal:
- Use a client portal platform
- Customize your web portal
- Integrate your tools and apps
- Connect your portal with your website
Let’s go through each of these steps.
1. Use a client portal platform
What a lot of people do at this stage is go out and look for developers to help them create a web portal. But you don’t need to do that.
Building a web portal from scratch is hard. And on top of that, it’s going to cost you a lot of money and time.
Luckily, we now have a lot of different client portal solutions you can use to help speed up the development of your web portal. Tools like Copilot, Moxo, or Dubsado are popular customer portal platforms used by businesses of all sizes.
But not all web portal software is created equal.
Some of them focus on your experience as an admin user. Some of them focus solely on your customer/clients’ experience in the portal, and some of them focus on both. In my opinion, what you want is a hybrid of both — a web portal that is customizable enough to give your team and your customers a great experience.
This is where Copilot comes to play. And I know what you’re thinking: isn’t this article on the Copilot blog? Yes, yes it is. But I don’t work at Copilot. I’m a customer of their tool and was asked to write about my experience creating my own web portal for my marketing agency using Copilot.
So step one, sign up for a client portal. In this case, we are going to use Copilot. You can sign up for a free account here. I also recommend you play around with the demo portal below to get a feel for what it’s like:
Okay, now that you have a free Copilot account, let’s go on to step two.
2. Customize your web portal
After signing up for Copilot, you’ll go through a few questions, and then you’ll be prompted to this screen:
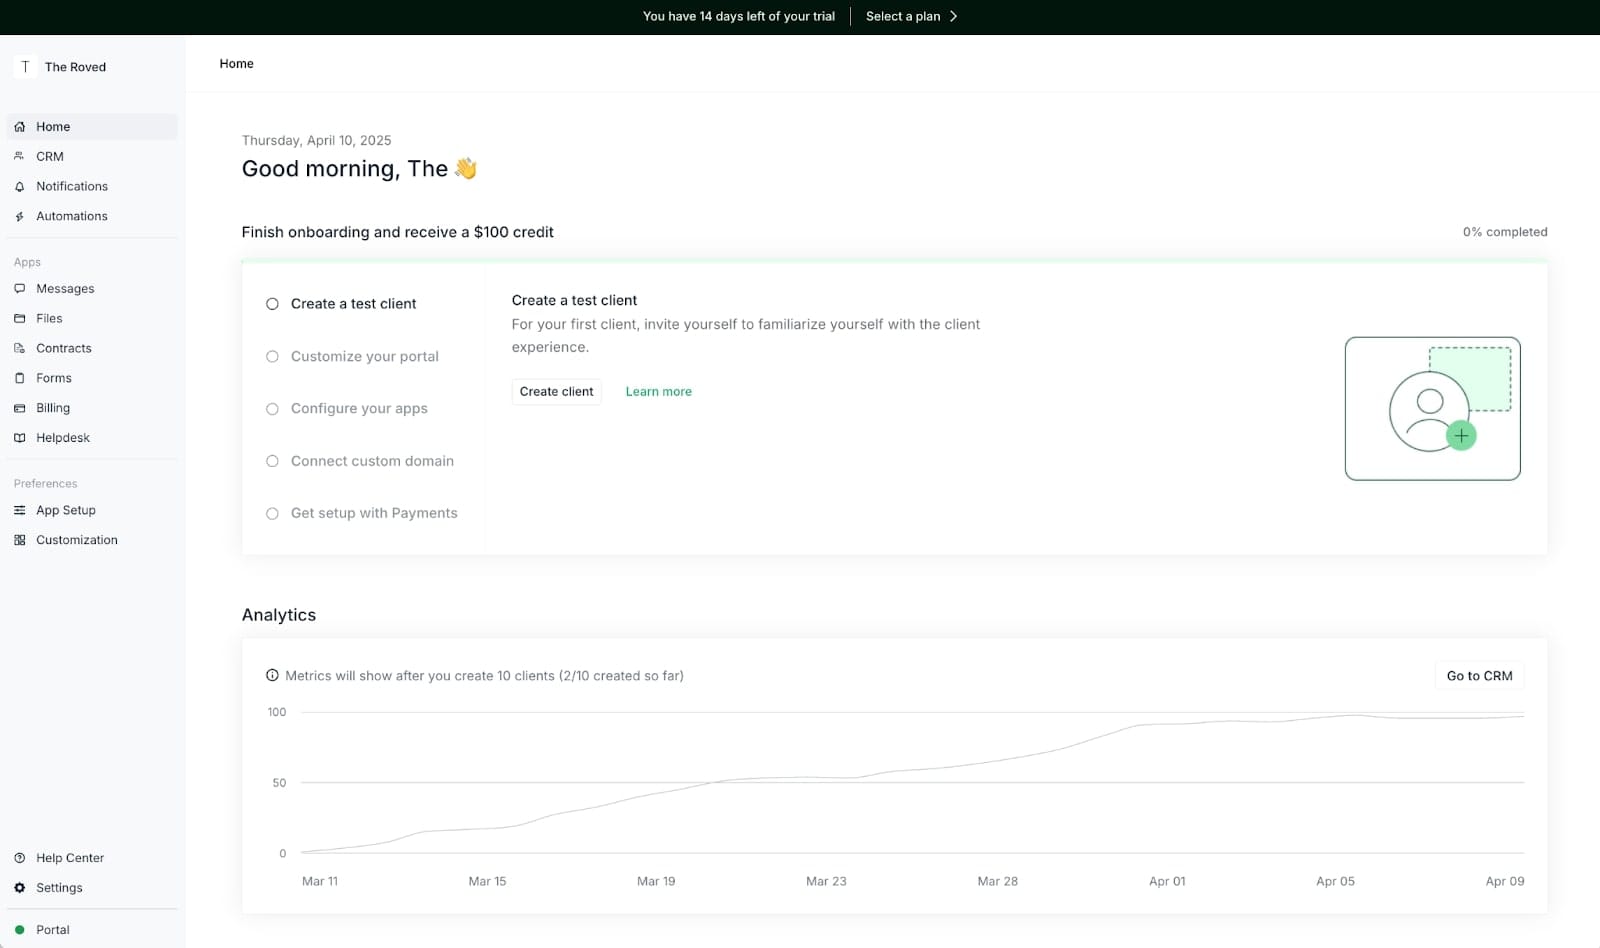
Here, you can allow the onboarding process to create a test client, customize your portal, and add all your apps.
If you want to follow along, you can create a test client with me by following this interactive demo:
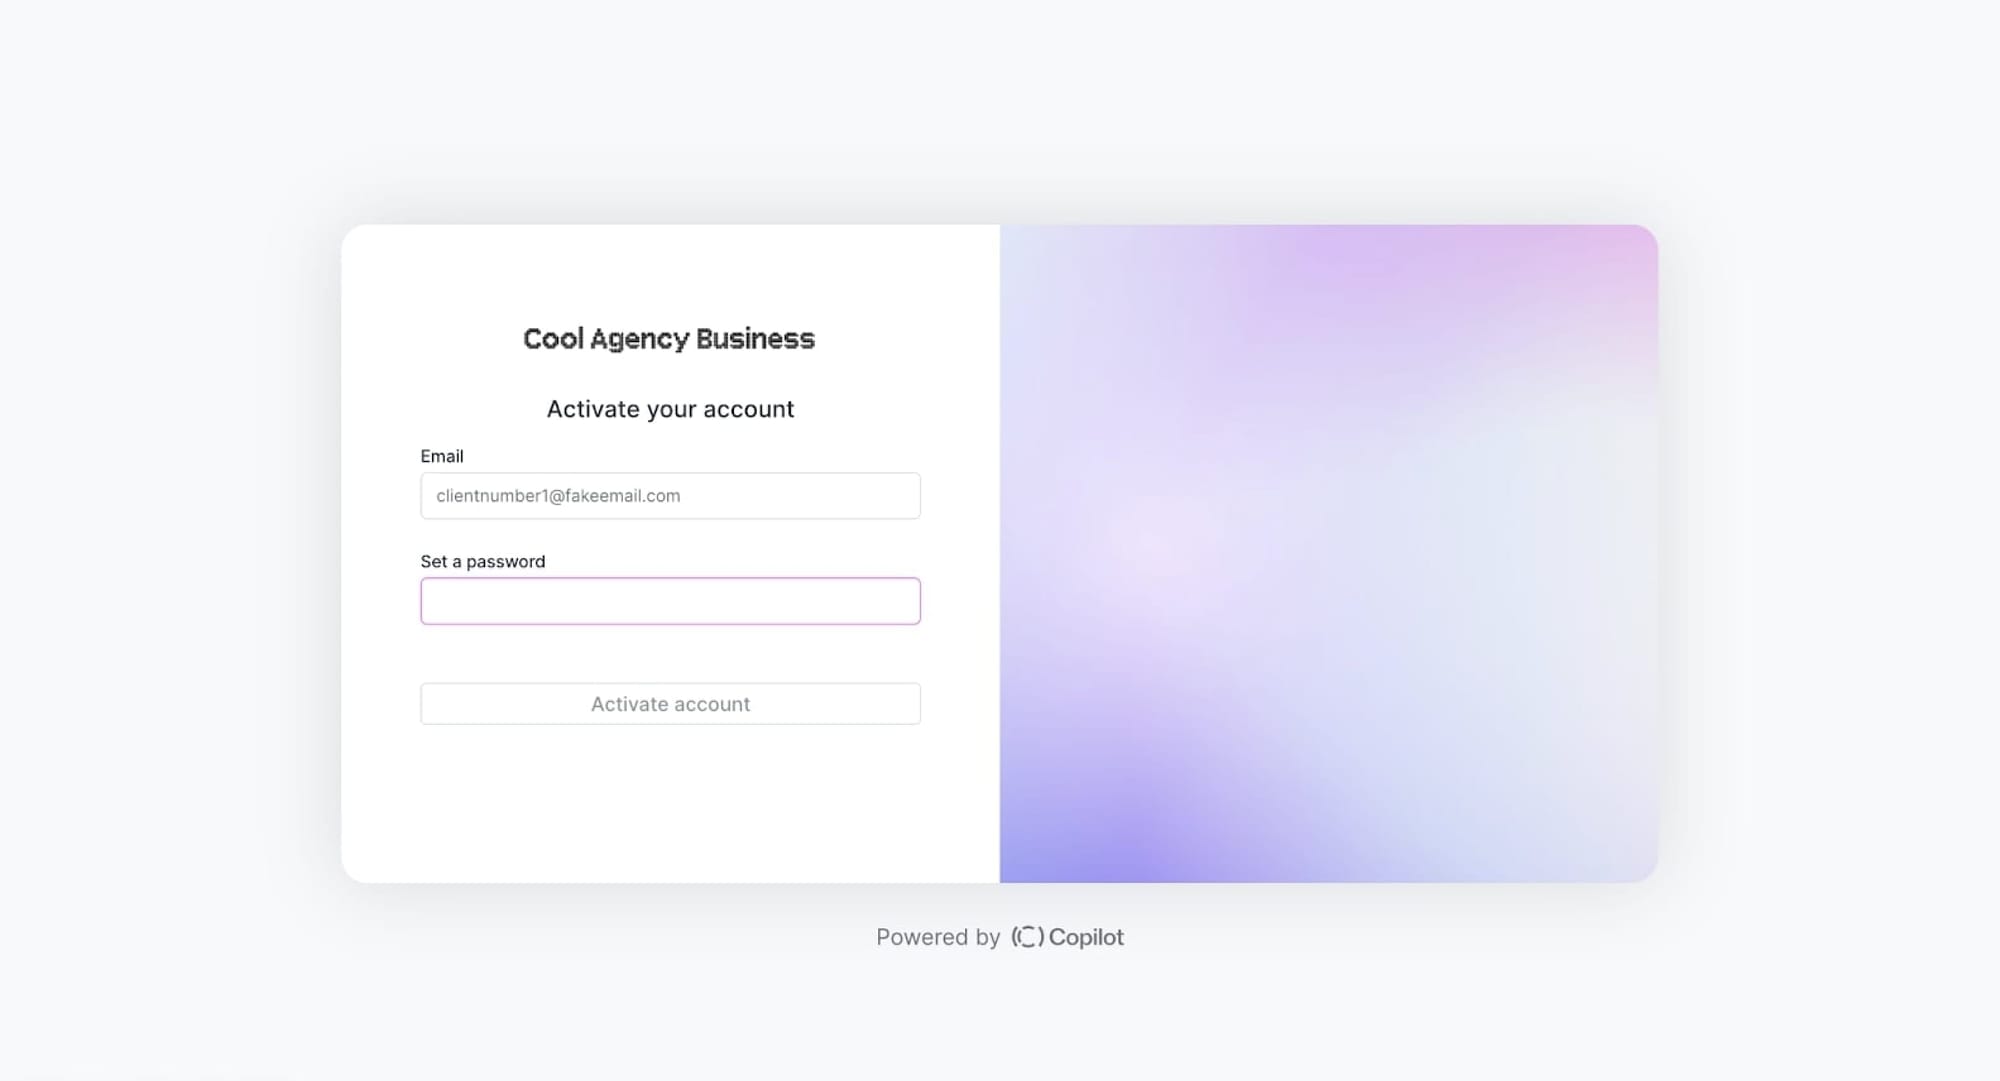
Once you create a test client, you can automatically email them with a web portal login link, or you can send them a magic link. In the case of my demo, the magic link gives our test client (Sarah) this view:
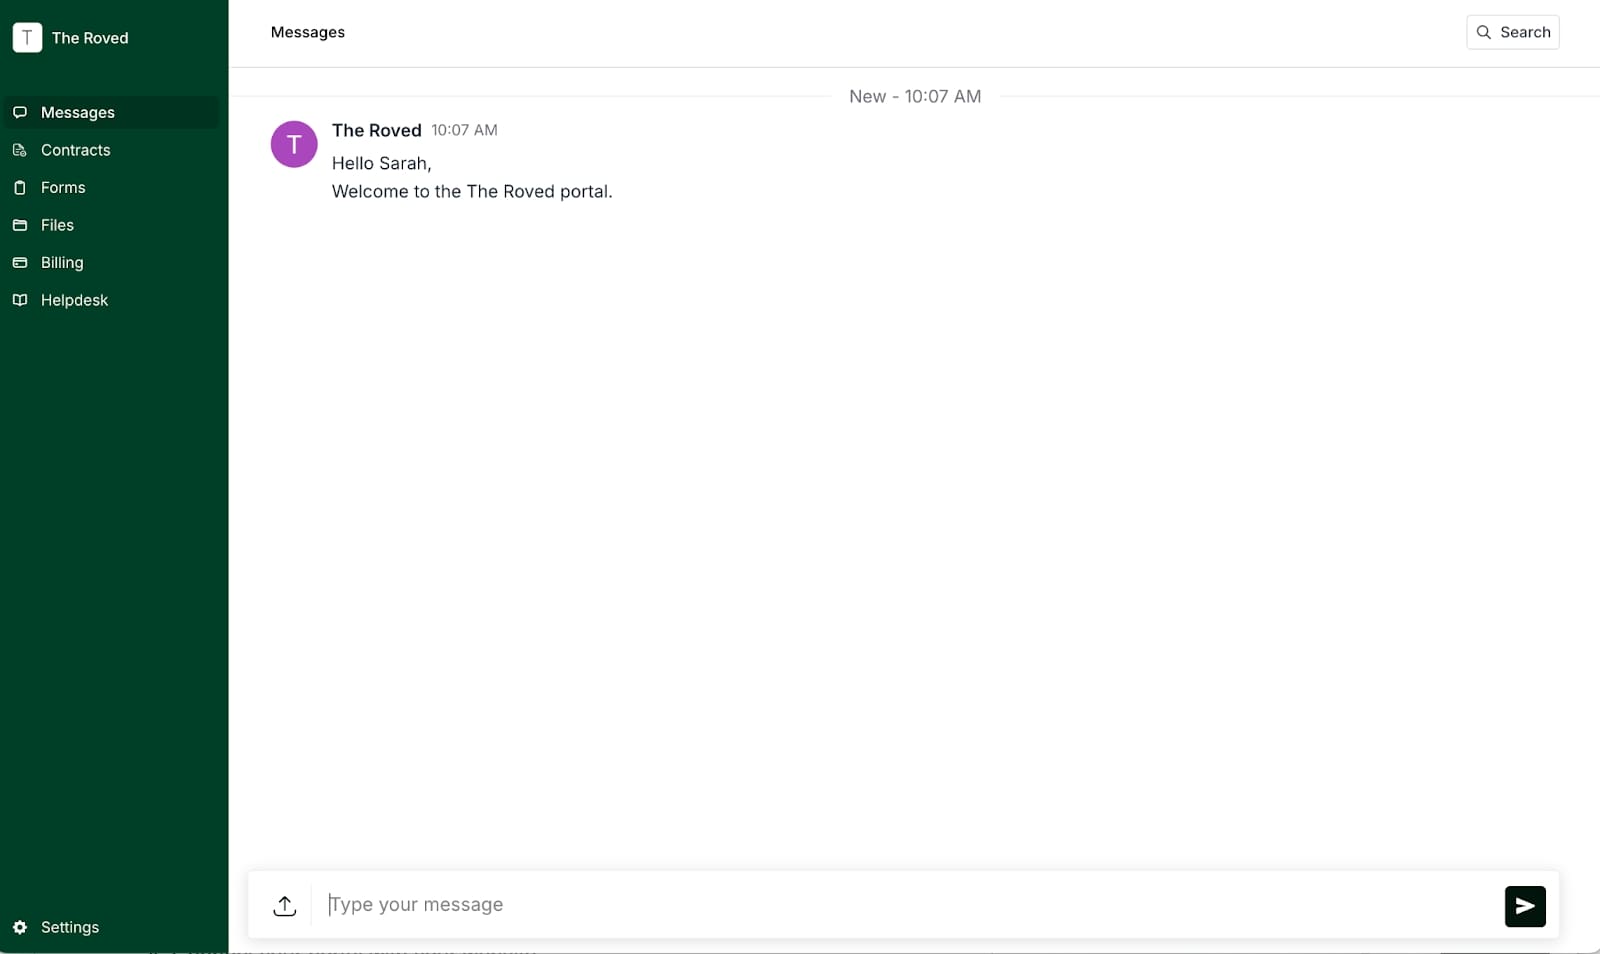
As you can see, it starts off with a welcome message (that can also be customized).
Speaking of customization, there’s a lot you can do:
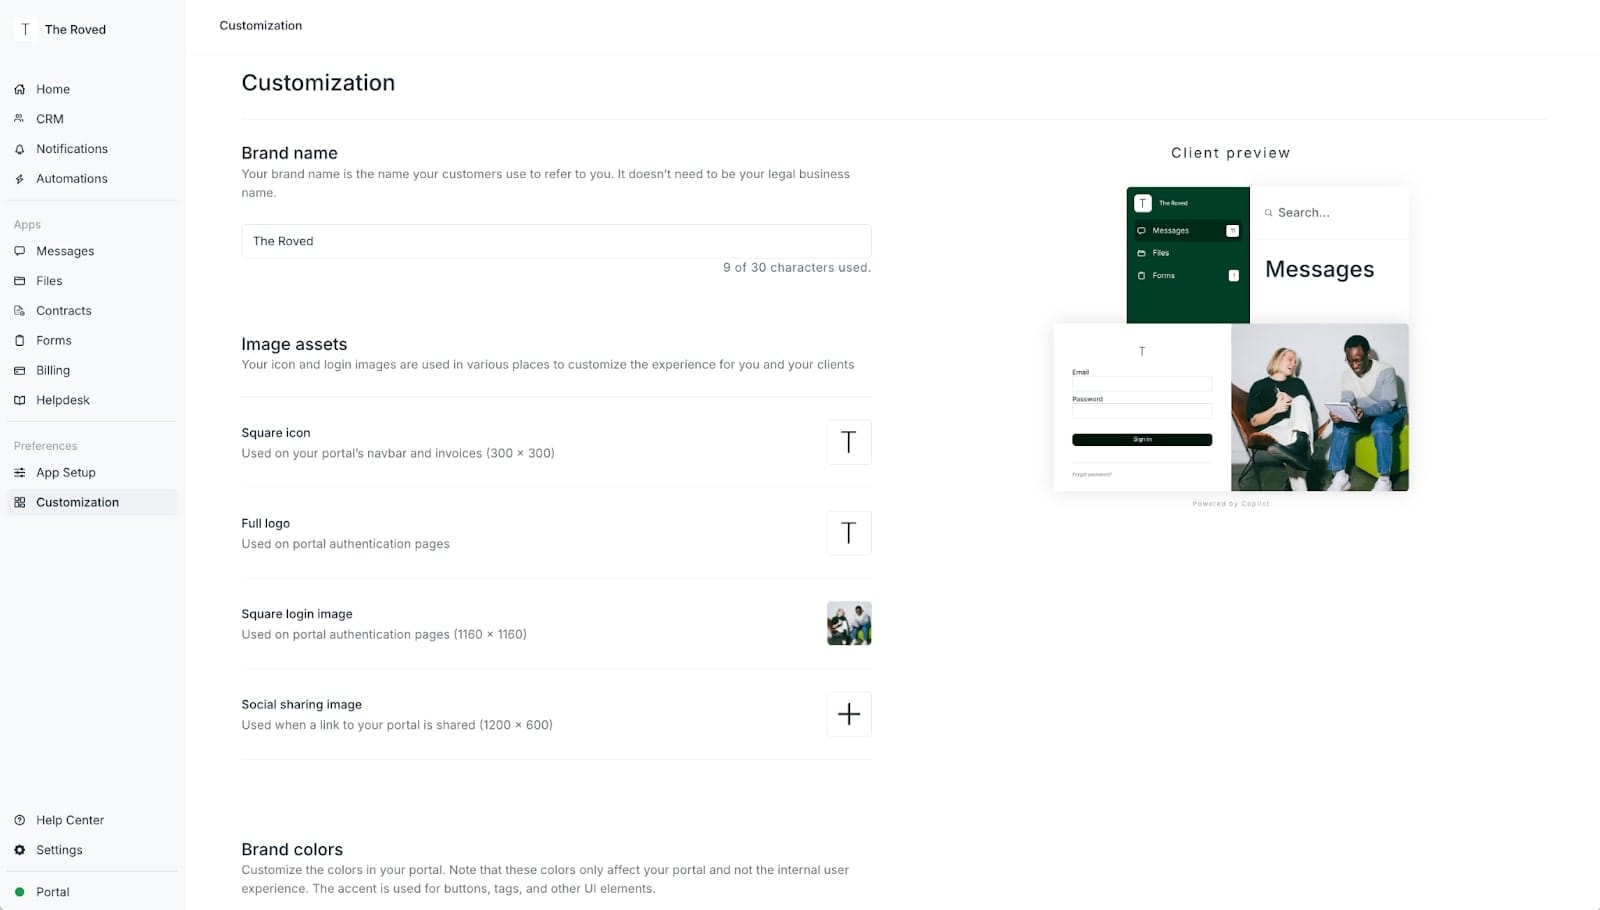
In Copilot, you can customize your web portal by:
- Choosing a dedicated brand name
- Adding logos and brand assets
- Changing brand colors
- Changing fonts in your web portal
- Updating the metadata
- Add client branding so clients see their own logos and branding
It’s safe to say there’s a lot you can customize.
Besides just customizing how your web portal looks, you also need to edit the functionality of what it can do. With Copilot, you get a fully extensible platform. This means you can integrate your web portal with existing apps you or your clients may already be using.
Let’s go over that in step three.
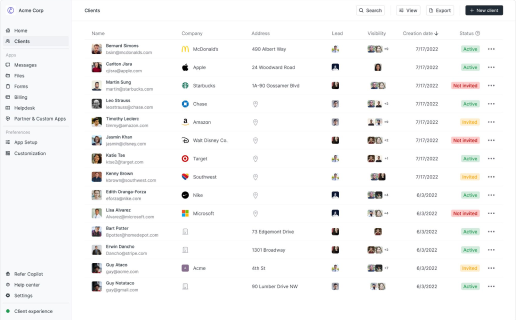
3. Integrate your tools and apps
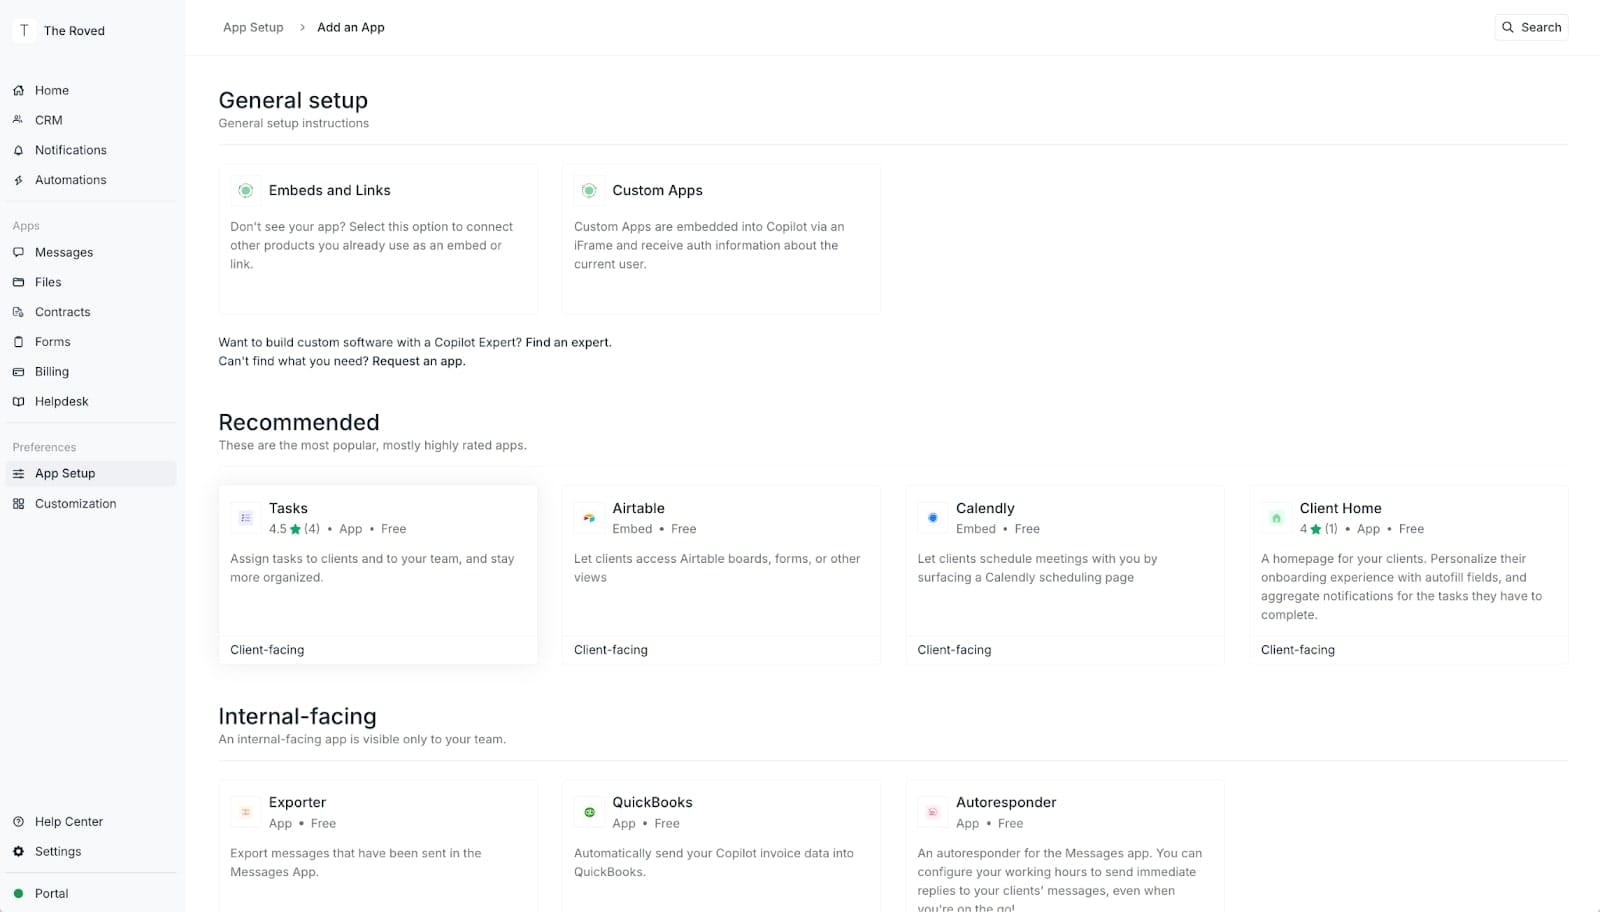
Now that your web portal is looking modern and clean, it’s time to add your favorite apps. In your admin portal, you’ll see an option for “App Setup” in the left-hand column. This page will give you all the settings you need to add and update the functionality of your web portal.
If you want to check out this page for yourself, go ahead and play around with the interactive demo here:
With apps in Copilot, you generally have three groups of options:
- Apps built by Copilot, like the Tasks app, Client Home, Autoresponder, and more.
- Apps built by third parties, like Airtable, Notion, QuickBooks, Google Docs, and more.
- Custom embedded apps, anything that can be added to your portal using an iFrame.
This gives you the flexibility to integrate almost any app you may already be using in your business into your web portal — bringing everything in one main “control center.”
I won’t get into too much detail on adding all the apps and what they do, but I highly recommend you play around with your Copilot web portal and have fun customizing the look and feel of everything.
Once your web portal is how you want it, it’s time to integrate it with your existing business website — this way, your customers and team members can easily log in and create an account through your website.
4. Connect your portal with your website
Remember earlier when I mentioned how you don’t need a developer to create a web portal for your website? Well, by now, you have a fully functional web portal that you created in just a few minutes! And from here, you’re going to learn how to integrate it with your website.
Don’t worry, it’s a lot easier than you think.
The first step is to add a custom domain in Copilot. This is all a part of the onboarding process, so there will be a guide on how to do this in there.
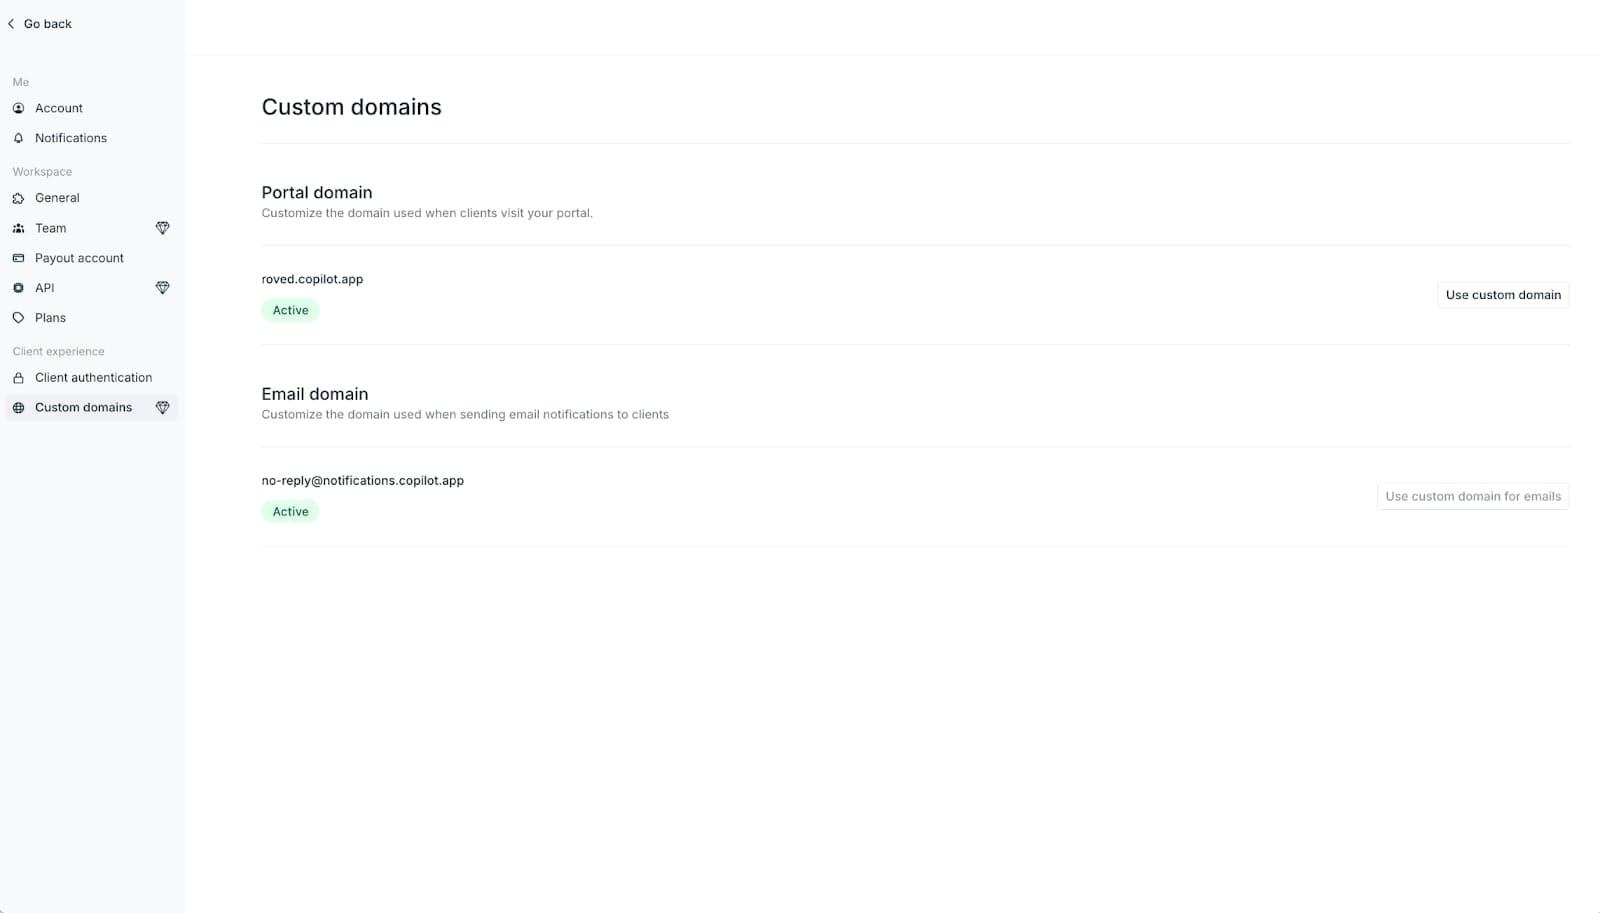
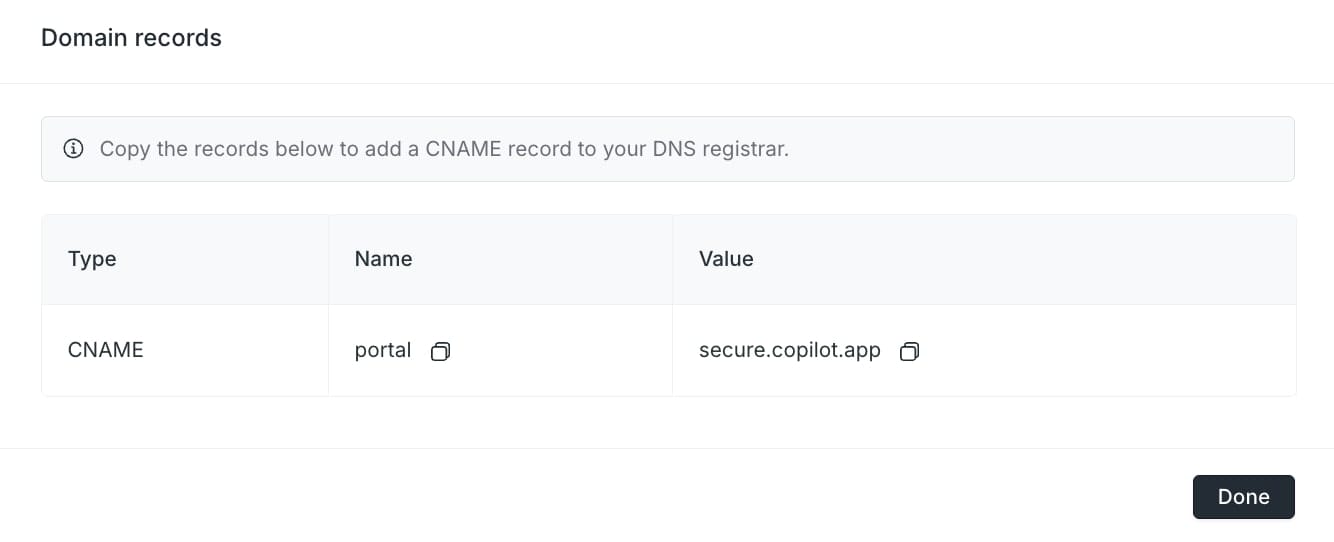
By default, you’ll have a Copilot domain for your portal. This is the same URL you created during the onboarding process. Once you click “Use custom domain,” you’ll see this screen:
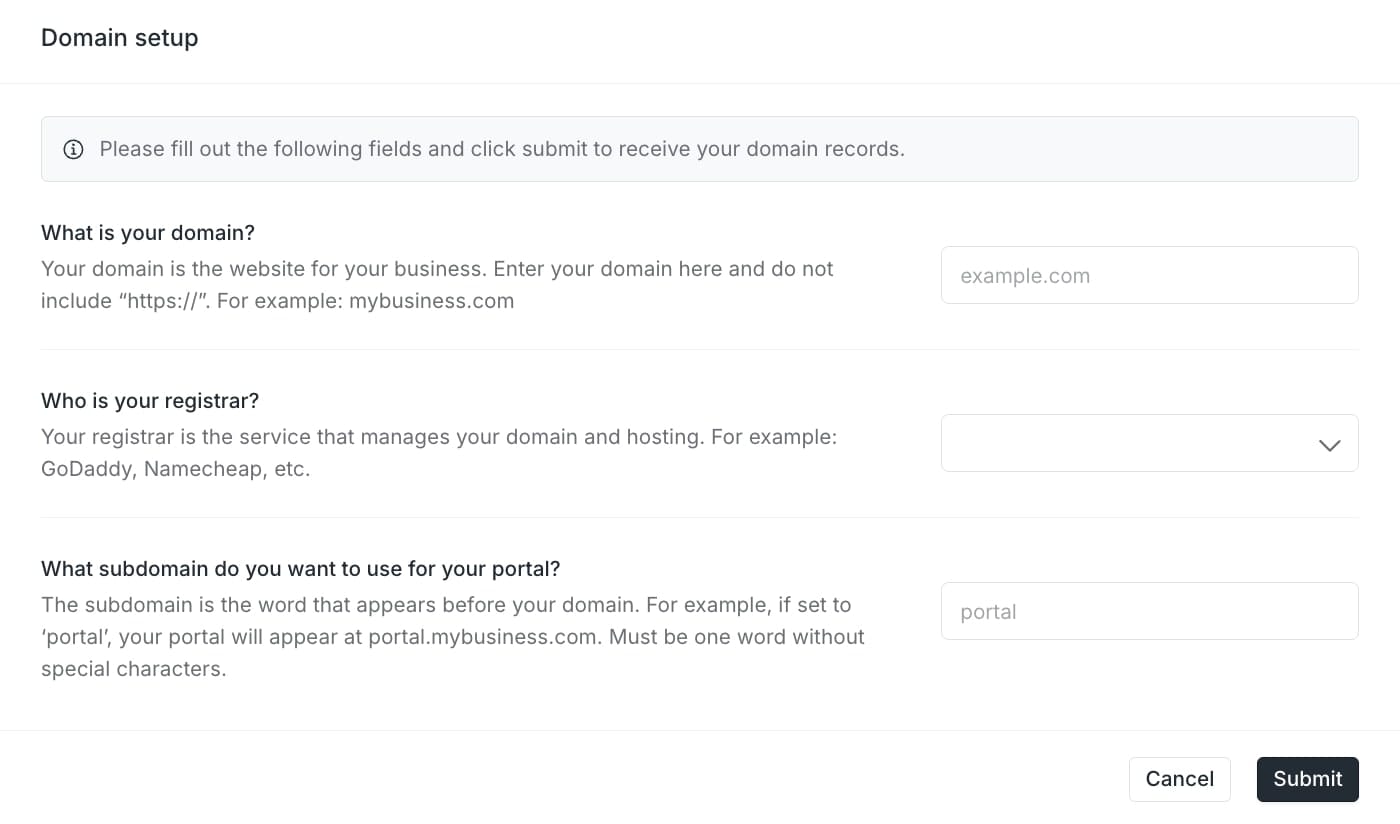
Here, you’ll enter your main business website’s domain, select where you bought your domain, and create a subdomain for your web portal.
For example, if your website is mywebsite.com, what most people do is put their web portal on portal.mywebsite.com. You can replace “portal” with any word you like, but it’s the most common one.
In this case, I added “portal” as my subdomain, and Copilot is telling me to add a new record in my DNS settings (you access this on the platform you bought your domain from).
Once you go through this process, you should have a working login screen on your web portal subdomain on your main website.
But now, you want to give your team and customers a way to access their web portal when they go to your main business website.
Here, you’ll want to simply create a “Log in” button somewhere on your main business website. And from there, you want that button to go to the web portal subdomain part of your website.
It’s a really simple and easy setup, and I have a few guides on this depending on the website builder you’re using:
- Guide for Webflow websites
- Guide for Squarespace websites
- Guide for WordPress websites
- Guide for Wix websites
- Guide for Framer websites
And that’s it! Now you have a fully functional web portal for your business — without writing a single line of code.
More than just a web portal
As you can see, creating a web portal isn’t as hard as one might think. If you use a white-label client portal tool, the entire portal creation process becomes super easy and seamless. Everything from customization, integration with your existing website, and inviting (and authenticating) users can all be handled by a modern client portal solution.
But, when using a platform like Copilot to create your web portal, you get more than a simple login screen that customers and clients can log into. You get an entire back office for your business.
Everything from managing and signing contracts, creating tasks, sending out invoices, creating recurring payments, and uploading sensitive documents can be done with Copilot. It’s why I use it to run my SEO agency and do everything from billing my clients to keeping them updated on project timelines and deadlines.
If you’re looking to create a modern web portal that makes your business feel like it has some flair, be sure to check out Copilot and sign up for a free account.
You’re just minutes away from having a clean web portal that will be a joy to use for both you and your customers.
Share this post
Sign up for our newsletter
Subscribe to our newsletter to receive emails about important announcements, product updates, and guides relevant to your industry.
